Car Jerks When Braking at Low Speed – Why & How to Fix?
You’re cruising down the road, feeling like the king or queen of the asphalt. Then suddenly, you hit the brakes, and your car jerks like a startled kangaroo. Not exactly the smooth, graceful stop you were going for, right? Well, fear not, fellow drivers, because we’re here to unravel the mystery behind that bumpy ride.
In this article, we’ll dive into the perplexing world of why your car jerks when braking at low speeds. We’ll explore the potential causes and provide expert advice on how to fix this jerking dilemma. Your smooth, bump-free stops are just a read away!
Causes of Car Jerks When Braking at Low Speed
So, what causes car jerks when braking at low speed? Well, the causes include the following:
- Worn brake pads and rotors
- Sticking brake calipers
- Malfunctioning ABS System
- Malfunctioning hydraulic brake system
- Unbalanced tires
Here is a detailed discussion of the causes:
1. Worn Brake Pads and Rotors
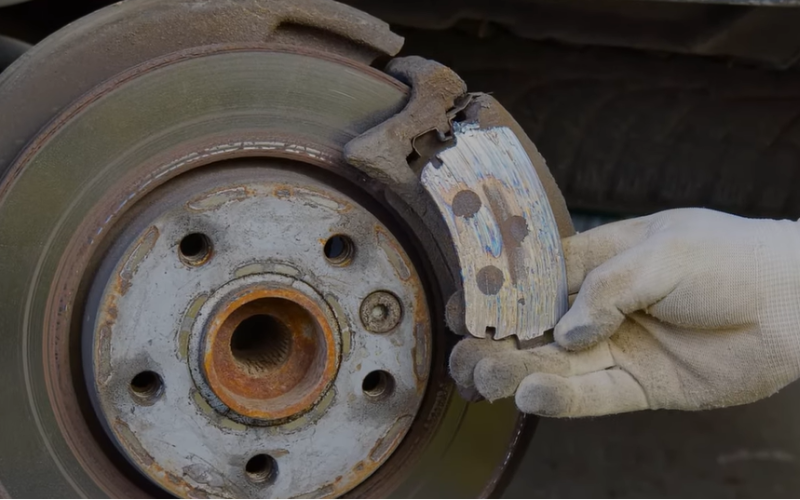
Over time, the friction material on brake pads wears down, resulting in reduced stopping power and uneven braking.
As a result, when you apply the brakes at low speeds, you will experience jerking sensations.
Read Also: Can Worn Brake Pads Cause ABS Light to Come On?(Find Now)
2. Sticking Brake Calipers
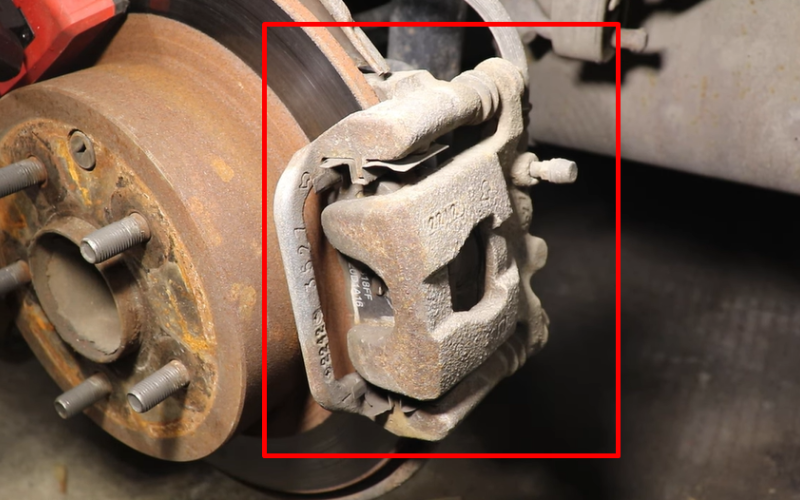
Brake calipers are responsible for housing your vehicle’s brake pads. They exert pressure on your car’s rotors when you press the pedal to slow down.
When the calipers become stuck or fail to release correctly, it can result in uneven braking. This leads to jerking sensations.
3. Malfunctioning ABS System
The Anti-lock Brake System (ABS) is designed to prevent the wheels from locking up during emergency stops, maintaining traction and stability.
If the ABS is faulty, it may interfere with the braking process and cause jerking sensations.
4. Hydraulic Brake System Issues
The hydraulic system transmits brake fluid pressure to the brake calipers. This allows them to clamp down on the rotors.
Issues such as leaks, the air in the brake lines, or blockages can disrupt the smooth operation of the brakes, resulting in jerking sensations.
5. Unbalanced or Worn-out Tires
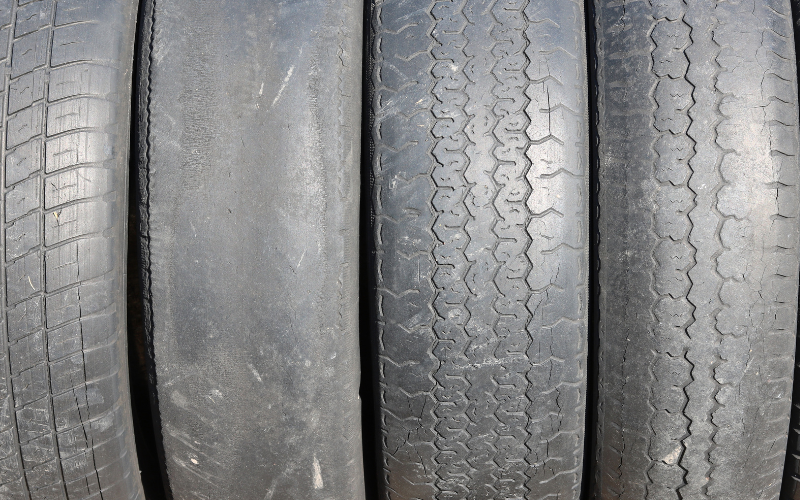
Tire imbalances occur when the weight distribution around the tire and wheel assembly is uneven. This causes vibrations that can be felt through the vehicle during braking.
Similarly, worn-out tires with irregular tread wear patterns can lead to an uneven braking experience.
How to Fix Car Jerks When Braking at Low Speeds?
Now, follow the steps below to fix the issues. But before that, make sure you have all the necessary tools and abide by the safety precautions. And then, go on one by one, from removing the wheels to reinstalling and testing the brakes.
Gather the Needed Tools
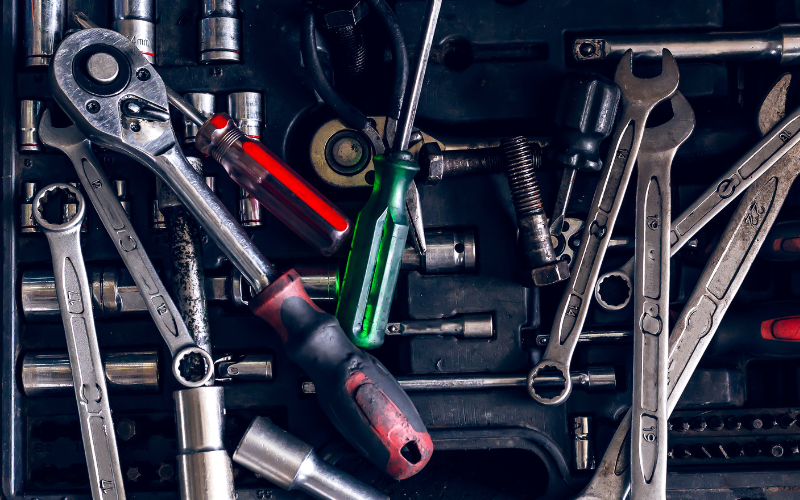
Here are the tools you should have:
- Jack and Jack stands
- Lug wrench and a socket set
- Brake pads and rotors
- Brake cleaner
- Brake caliper compression tool
- Torque wrench
- Service manual or online resources
Safely Lift and Secure the Vehicle
Safety is paramount when working on your vehicle. Before starting any repair procedure, follow the process to lift and secure your vehicle:
- Drive your vehicle to a flat surface. Engage your parking brake.
- Place your wheel chocks on the wheels opposite to the ones you’ll be working on to prevent the vehicle from rolling.
- Loosen all lug nuts with a lug wrench and your socket set. You are just loosening them and not removing them completely.
- Using a jack, lift the car according to the manufacturer’s instructions. The lifting points are typically indicated in your manual and differ for each vehicle.
- Once the vehicle is lifted, secure it with jack stands positioned on sturdy parts of the chassis or recommended locations specified in the manual.
- Gently shake the vehicle to ensure stability and security before proceeding with the repairs.
1st: Remove the Wheels and Inspect the Brakes
You can remove the wheels and inspect the brake components with the vehicle safely lifted and secured. Take the actions accordingly:
- Remove the car’s lug nuts. Carefully slide the wheels off the wheel studs.
- Inspect the pads and rotors for wear, damage, or unevenness. Look for thin or worn brake pads, grooved or warped rotors, and other abnormalities.
- Check for loose or sticking brake calipers, ensuring they slide freely without obstructions.
- Examine the wheel speed sensors and wiring for any visible damage or disconnection.
2nd: Clean and Lubricate the Brake Components
Before proceeding with any replacements or repairs, it’s essential to clean and lubricate the brake components for optimal performance. Follow the process to do so:
- Use a brake cleaner to spray the calipers, pads, rotors, and other relevant parts.
- Wipe away any excess dirt, debris, or brake dust using a clean cloth.
- Inspect the caliper guide pins and ensure they move freely.
- Remove the pins, clean them, and apply a thin layer of high-temperature brake grease before reinstalling.
- Apply a light coat of high-temperature brake grease. Start with the contact points between the pads and caliper brackets.
- Avoid getting grease on the brake pad friction material or rotor surfaces.
Here is a YouTube video illustrating how to do this visually:
3rd: Replace Worn or Damaged Brake Components
If the inspection reveals worn or damaged brake components as the cause of the jerking issue, it may be necessary to replace them. Here’s how to proceed:
- Remove the caliper by loosening and removing the caliper bolts or pins.
- Carefully lift the caliper away from the pads and rotor, not damaging the brake hose.
- Inspect brake pads for wear. Replace them with new pads if they are below the minimum thickness or show uneven wear. The minimum thickness is typically 3.2mm. Anything lower than that is unacceptable.
- Before installing the new pads, compress the caliper piston using a brake caliper compression tool. This step is necessary to provide clearance for the new, thicker brake pads.
- Install the new pads and adequately align them within the caliper bracket.
- Examine the brake rotors for excessive wear, grooves, or warping. If any of these issues are present, replace the rotors with new ones. Replacing involves removing the old rotor, greasing the surface and replacing it with a new one.
- Reinstall the brake caliper and tighten the bolts or pins to 55 ft-lbs.
- Examine the wheel speed sensor. Use a multimeter to measure circuit continuity. Check to see if there are any loose connections. If it has loose connections, tighten them. If it fails the continuity test, replace it with a new sensor of the same type and model.
- Repeat the above steps for the remaining wheels, ensuring consistency in the replacement process.
Read Also: How Long Will 3mm Brake Pads Last? (The Ideal Thickness)
4th: Diagnose and Repair ABS Malfunction
If you suspect an ABS malfunction is the cause of the jerking issue, follow these steps to diagnose and potentially repair the problem:
- Step 1: Consult your vehicle’s service manual or an online resource to locate the ABS control module and related components. Here is where it is typically located:

An Image showing the location of the ABS control module [Source]
- Step 2: Inspect the ABS sensors mounted near each wheel for any visible damage, such as loose connections, broken wires, or accumulation of dirt or debris. Clean the sensors if necessary.
- Step 3: Use a multimeter to test the resistance of each ABS sensor. Resistance should range between 900 to 2,000 ohms. If it’s not within the range, remove the old malfunctioning sensor and replace it with the same type. Copy all the connections from the old sensor to the new one.
- Step 4: Check the ABS control module for any error codes using an OBD-II scanner. Error codes can provide insights into specific issues within the ABS. Possible error codes include the following:
- C1111: ABS pump motor stuck on, due to relay or module problem.
- C1145 and C1155: Right or left front wheel speed sensor circuit malfunction, caused by sensor, wiring, or connection issues.
- C1165: Right rear wheel speed sensor circuit malfunction, due to sensor, wiring, or connection issues.
- C1175: Similar to C1165, left rear wheel speed sensor circuit issue.
- C1210: ABS control module malfunction.
- C1233: Warning light circuit issue, caused by wiring or faulty light bulb.
Once you have got your error code, you need to act on fixing it. If it’s a wiring issue, you know you need new wires. If it’s a specific module that is malfunctioning, you will have to replace it with a similar component bearing the same specifications.
The OBD-II scanner: Our pick [product] can help you retrieve these error codes.
5th: Address the Hydraulic System Malfunction
If a hydraulic system malfunction is suspected as the cause of the jerking issue, follow these steps to address the problem:
- Step 1: Inspect the brake lines and connections for any visible signs of leaks, corrosion, or damage. Repair or replace any damaged components as needed.
- Step 2: Bleed the brake system to remove any air trapped in the brake lines. This involves opening the bleed valves in your system until the hydraulic fluid flows freely.
- Step 3: Check the brake fluid level in the master cylinder reservoir. If the fluid is low, top it up to the maximum level. Ensure the fluid is clean and free of contaminants.
- Step 4: A complete flush and replacement may be necessary if the brake fluid appears dirty or contaminated. This process helps remove any moisture, debris, or old fluid affecting brake performance.
- Step 5: Inspect the brake master cylinder for any malfunction, such as a worn or damaged piston. Here, we recommend you consult a professional if the master cylinder needs to be repaired or replaced.
6th: Reinstall the Wheels and Test the Brakes
Once the necessary repairs or replacements have been made, it’s time to reinstall the wheels and test the brakes. Follow these steps:
- Step 1: Carefully place the wheels back onto the studs and hand-tighten the lug nuts.
- Step 2: Lower the vehicle from the jack stands using the jack.
- Step 3: Once the vehicle is on the ground, use a torque wrench to tighten the lug nuts in a star pattern.
- Step 4: After ensuring all lug nuts are correctly tightened, test the brakes by performing a few gentle stops from low speeds in a safe and open area. Pay close attention to the braking feel and observe whether the jerking issue has been resolved.
If you still experience the issue, you must have misaligned and unbalanced wheels. Have a specialist balance your wheels using a computer, and the issue will vanish.
FAQs
Here are questions that you may have about car jerks when braking:
Is it Safe to Continue Driving if my Car Jerks When Braking at Low Speeds?
No. We do not recommend continuing driving if your car jerks when braking at low speeds. Jerking during braking is a sign of a severe issue with the braking system. Driving with a malfunctioning braking system is dangerous.
How do I Prevent my Car from Jerking when Braking at Low Speeds?
Maintain regular brake inspections and replace worn brake pads or damaged components promptly. It is recommended that you inspect your pads after every 15,000 miles or 6 months, whichever comes first.
Also, keep an eye on the ABS warning light on your dashboard and address any ABS malfunctions promptly. Avoid sudden or aggressive braking, increasing the likelihood of jerking.
Why Can’t I DIY Wheel Balancing to Fix Car Jerks?
We do not recommend this as the procedure requires specialized equipment and expertise. Wheel balancing involves accurately distributing the weight of each wheel and tire assembly to ensure smooth rotation.
Automotive professionals use precision balancing machines to identify weight imbalances and apply counterweights precisely.
Read Also: How Long Can You Drive Without Brake Pads? – Is It Safe
Conclusion
Experiencing car jerks when braking at low speed can be a concerning and potentially dangerous issue. By understanding the potential causes, you can better understand the underlying problems. This will allow you to take appropriate steps to address them.
Remember to stay proactive in maintaining your vehicles’ braking systems. Also, seek timely repairs to address any jerking issues. You can enjoy confident and smooth braking by staying vigilant and prioritizing regular inspections and necessary repairs. This promotes both comfort and safety on the road.

Meet Zayan, the mechanical genius behind the highly acclaimed brakes problems and solutions website. With over a decade of hands-on experience in the automotive industry, Zayan has become a trusted authority in the realm of brake systems.
His passion for cars, coupled with his expertise in solving complex brake-related issues, has earned him a devoted following of car enthusiasts, mechanics, and everyday drivers seeking reliable guidance.