No Brake Pressure after Bleeding – Why & How To Fix It?
Brake bleeding ensures optimal braking function and guarantees traffic safety at the same time. It can be dangerous if your vehicle doesn’t regain brake pressure after bleeding.
The pedal can become soft and spongy if air is trapped in brake lines. It can reduce braking effectiveness. Brake bleeding purges the air from the system and enables the appropriate transfer of hydraulic pressure.
If there is no brake pressure after bleeding, there can be multiple reasons for this. Keep reading to know more about the causes and ways to regain brake pressure after bleeding.
Why There Is No Brake Pressure After Bleeding?
There are several reasons you may find no brake pressure after bleeding. The most common causes include the following.
- Unfinished bleeding
- Brake system leak
- Master cylinder issue
- Brake system contamination
- Breakdown of a brake component
- ABS dysfunction.
Here, we will discuss all the reasons, and their potential solutions to fix them. After fixing them, you have to re-bleed the brakes to gain the pressure.
Read Also: No Brake Pressure When Car Is Running – How To Fix?
Unfinished Bleeding
Due to unfinished bleeding, air may still be in the brake lines. Brake pedal sensation can be mushy or nonexistent due to air in the system. Make sure the bleeding operation was carried out correctly by rechecking it. Repeat it if required.
Brake System Leak
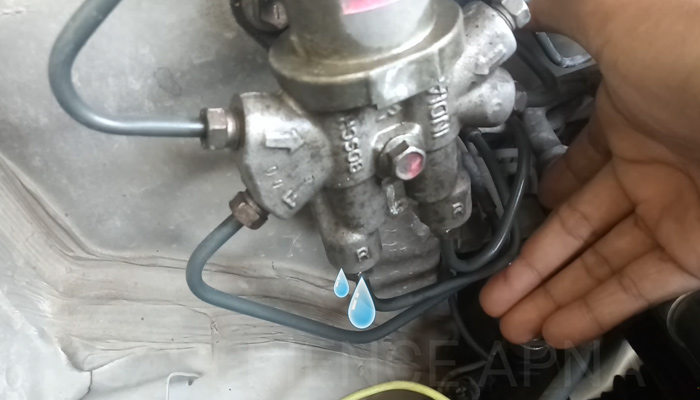
Even after bleeding, the brake fluid leak might cause a reduction in braking pressure. Look for any indications of leaking throughout the whole braking system.
Check the master cylinder, brake lines, calipers, and wheel cylinders. Fluid drops, damp patches, or a drop in the braking fluid level can all be signs of leaks. Before attempting to bleed the brakes once more, you need to fix the leak.
Read Also: No Brake Pressure After Changing Calipers: Here’s Why & How To Fix
Issues With the Master Cylinder
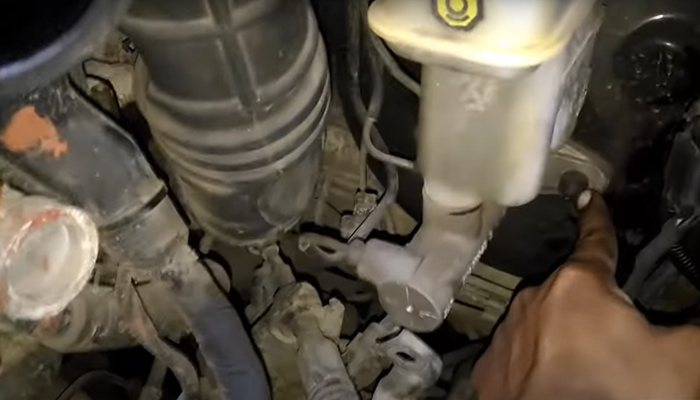
A vital part of the braking system that produces hydraulic pressure is the master cylinder. Brake pressure loss may result from a malfunctioning or broken master cylinder.
A sinking brake pedal, brake fluid leaks from the master cylinder, or a tainted brake fluid reservoir indicates a failed master cylinder.
Solution:
In such circumstances, you need to replace or recondition the master cylinder by following this process: (our pick).
- Disconnect the brake lines from the master cylinder.
- With the help of a socket wrench, you have to manually remove the bolts connecting the master cylinder to the brake booster.
- Carefully remove the master cylinder and put in a new master cylinder.
- Tightly connect the bolts.
- Add fluid to the reservoir, allowing leaks through the brake pipe openings.
- Brake the bleeds. Get a container beneath the holes while someone slowly pumps the brakes. This way, the master cylinder air will be purged.
- Reconnect the battery if it is unplugged.
- Start the engine and repeatedly press the brake pedal to generate pressure before doing a last check to ensure all fittings are secure.
Contamination of The Brake System
Loss of braking pressure may result from contaminated brake fluid that contains moisture, dust, or air. Over time, brake fluid absorbs moisture and loses some of its efficiency.
Furthermore, foreign objects or air might obstruct brake components or lines. These objects make it difficult for the brakes to function correctly.
Solution:
You can fix contamination problems by flushing the braking system and refilling the brake fluid.
- Set the vehicle in gear and put a halt behind the tires on a level area to prevent rolling.
- Locate the master cylinder by lifting the hood. The brake fluid is dispensed from this. Open the master cylinder cap and cover it with an old rag in case there is a spill.
- Drain all the liquid using a turkey baster. Using new brake fluid, refill the reservoir all the way to the fill line.
- Use new brake fluid, and refill the reservoir all the way to the fill line.
- To reach the caliper you are going to bleed, you should jack up that side of the car.
- After you jack up the automobile and remove the wheel, secure it using jack stands.
- Discover where the bleeder valve is. To prevent the brake fluid from dripping everywhere, it is helpful to place a rubber hose over it.
- The brakes should get firmer after around four brake pumps. Open the bleeder valve while they are still keeping the brake pedal down, and fluid will flow out. The secret is to have your helper signal you to close the valve just as they press the brake pedal all the way down.
- Continue doing this until new brake fluid leaks out. You will observe a change from a darker to a lighter fluid, which indicates that fresh fluid has filled that brake line.
- Make sure that the brake fluid never drops below the minimum indication on the master cylinder. Repeat the procedure for the remaining brake calipers.
- After completing all four corners, top off the fluid in the reservoir, tighten the wheel nuts to the appropriate torque. Test the brakes before starting the car.
Breakdown of A Brake Component
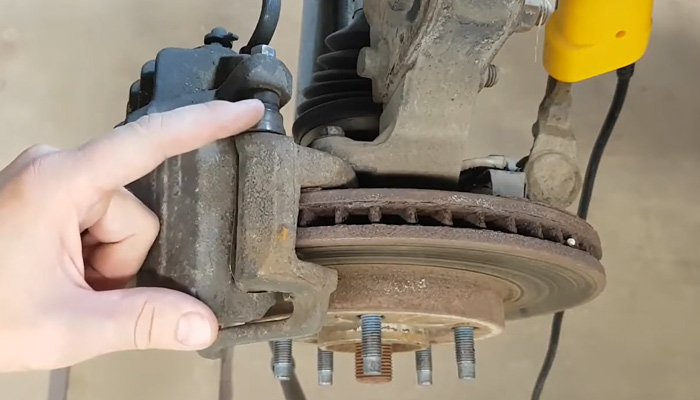
There’s a chance that one of the braking system’s parts, such as the caliper, wheel cylinder, or brake hose, has failed or isn’t working properly. Look closely for any damage or malfunctions with these parts, and replace them if required.
ABS Dysfunction
A problem with the ABS module or sensors might influence brake pressure if your car has an anti-lock braking system (ABS). Brake pressure may completely disappear or pulsate if an ABS problem is present. In some situations, a professional diagnostic scan and repair may be necessary to fix the ABS issue.
Solution:
You can repair the ABS light by taking these steps:
- When you start a car, the ABS light always flashes briefly. If you’re lucky, a computer blip has prompted it to stay on. If so, all you might need to do to turn off the light is to switch the car off and on again.
- Open the hood when the engine is off and look for your battery.
- The nut holding the cable to the positive (+) battery terminal may be removed with a socket wrench. The battery cable should not touch the battery, so disconnect it and place it somewhere else.
- Allow the computer (ECU—Engine Control Unit) to reset by waiting 15–30 minutes.
- Close the hood, tighten the nut, reconnect the battery cable, and then start the car.
- To complete vehicle specific reboot procedures consult your owner’s handbook or get in touch with the dealer.
How Do I Regain The Pressure in My Brakes after Bleeding?
To regain brake pressure after bleeding, you have to repeat the brake bleeding process. You already know what to do if you have done it the first time. If you took professional help to brake pressure and now want to re-bleed on your own to regain brake pressure, here’s a brief guideline for you:
Required Tools:
- A wrench or socket set
- A brake bleeding kit (our pick)
- Fresh brake fluid of the right kind for your car
Precautions:
- Put the parking brake on when you place your car in a level parking space for this process.
- Utilizing wheel chocks to stop the vehicle from rolling.
Let’s have a detailed look at this process:
Step 1: Locate The Master Cylinder
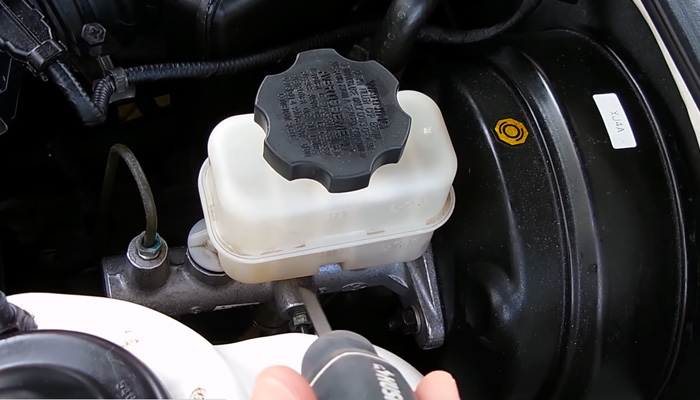
The master cylinder is often found close to the firewall on the driver’s side of the engine compartment. Check the level of the brake fluid and locate the master cylinder reservoir. It ought to be stuffed to the suggested level.
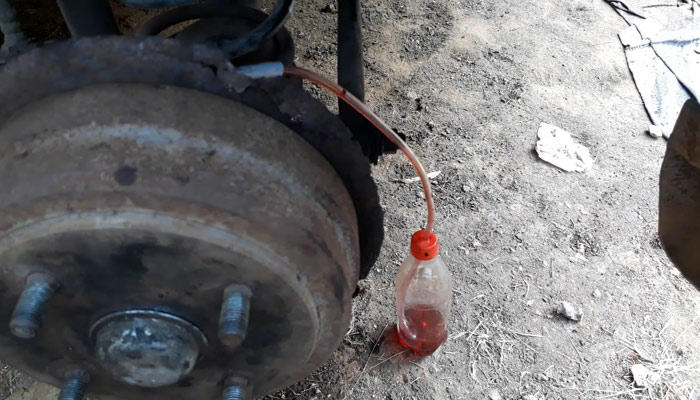
Step 2: Connect Hose
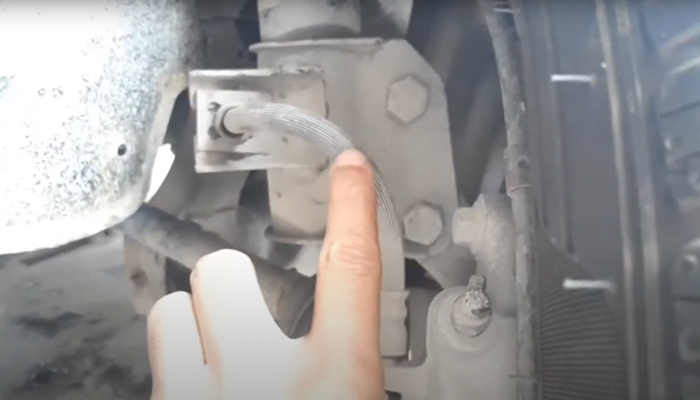
Start with the brake that is farthest away from the master cylinder. The bleeder screw on the brake caliper or wheel cylinder is where the clear hose should be connected. The collecting container should receive the hose’s opposite end.
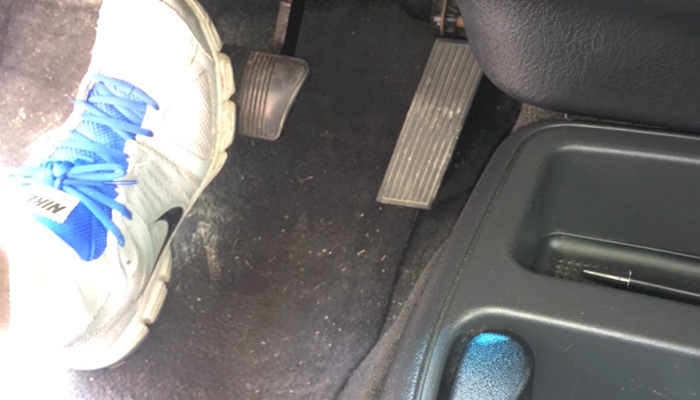
Step 3: Removing Air Bubbles
Have a helper firmly compress and maintain the brake pedal. With a wrench, loosen the bleeder screw to let the brake fluid flow into the container through the hose.
Check the fluid for any air bubbles. Close the bleeder screw securely after the flow has stabilized. Continue doing this until you see clear brake fluid free of air bubbles.
This video will help remove air bubbles.
Step 4: Check The Brake Fluid Level

Move from the farthest brake to the closest brake while bleeding the remaining brakes. To avoid air entering the system, remember to frequently check the brake fluid level in the master cylinder reservoir and top it off as needed.
Read Also: Why Does Brake Pedal Goes to Floor after Bleeding?(4 Causes)
Step 5: Check The Brake Pedal
Ask your assistant to gradually remove the brake pedal once you have bled all the brakes. The pedal should feel responsive and firm. You might need to repeat the bleeding procedure if it feels spongy or the air is still in the system.
After completing all these steps take your car for a test drive. Apply the brakes gradually to ensure they engage easily and have enough stopping strength.
Pay attention to any unusual vibrations, sounds, or changes in how the pedal feels. If you discover any problems, seek the advice of a qualified technician for additional inspection.

Image Source: Second Chance Garage
This video will assist you in completing this process.
Guidelines for Safety During Brake Bleeding
Follow these safety guidelines to complete brake bleeding without any hassle:
- Put on protective gear, such as safety glasses and gloves.
- To prevent breathing in brake fluid fumes, work in a well-ventilated environment.
- For detailed information on how to do brake bleeding, consult the owner’s handbook or manufacturer’s recommendations.
- Before beginning the bleeding operation, ensure the brake fluid reservoir is filled to the required amount.
- Brake fluid shouldn’t be allowed to come into touch with painted surfaces since it can harm them. Spills must be quickly cleaned up.
- After each bleeding procedure, tighten the bleeder screws firmly to stop leakage.
- After bleeding, check the brakes carefully to ensure they work correctly before starting the automobile.
FAQs
Now that you know why there is no brake pressure after bleeding we will answer some of the most frequent queries related to them.
How Should The Brake Pedal Feel After Bleeding?
The brake pedal should feel strong and responsive once the brakes have been bled. The brake pedal should engage with no sponginess or excessive travel when you press it.
Why Is My Brake Pedal To The Floor After Bleeding?
A worn-out or dysfunctional master cylinder may be the blame. It could be necessary to replace the master cylinder if it isn’t operating as intended. If your brake pedal still travels to the floor, the new master cylinder can be faulty.
How Many Presses Does It Take To Bleed Brakes?
It usually requires multiple pressing of the brake pedal to bleed the brakes and eliminate air effectively. Depending on the system’s intricacy and the quantity of air present, the needed number of pushes might range from 3 to 10 or more.
Conclusion
In conclusion, there are several reasons for no brake pressure after bleeding. The brakes must be properly bled to remove air and restore hydraulic pressure.
The best technique to remove air bubbles and restore pressure is to bleed the brakes systematically. You can begin with the wheel farthest from the master cylinder and progressively move your way through each wheel.
After bleeding the brakes, don’t forget to keep an eye on the amount of braking fluid in them and their general functionality. But it’s also crucial to check for any underlying problems that can jeopardize the braking system’s integrity. Regularly examine the issue to determine the root cause and take the appropriate corrective action.

Meet Zayan, the mechanical genius behind the highly acclaimed brakes problems and solutions website. With over a decade of hands-on experience in the automotive industry, Zayan has become a trusted authority in the realm of brake systems.
His passion for cars, coupled with his expertise in solving complex brake-related issues, has earned him a devoted following of car enthusiasts, mechanics, and everyday drivers seeking reliable guidance.